There are two types of complexity — the good kind and the bad kind.
Example 1: This espresso is bursting with complex notes of dark chocolatey nuttiness.
Example 2: Trying to make espresso at home is way too complex; I’ll just go to X-bucks.
See the difference?
We believe the only complexity in your coffee-making process should be the taste of the finished product in your mug. So we’d like to introduce you to simple solutions for how to make espresso at home.
Perhaps you’re now asking, “But what if I don’t have an espresso maker?”
Lacking a fancy espresso machine doesn’t have to hold you back! You can still indulge in the full-bodied richness of a freshly-made espresso anytime you’d like. We’ll tell you exactly how you can make espresso without a machine.
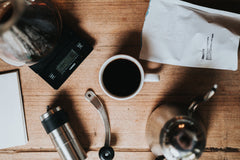
So, my coffee-sipping friends, let’s take an up-close look at the art of making espresso!

Coffee vs. Espresso — What’s the Difference?
All espresso is coffee, but not all coffee is espresso. Huh?
They both rock that deep brown hue that attracts our jitter-loving souls. And both carry the incredible aroma that lures you in, sip after sip. The beans even look the same — oh wait, maybe not…
When paired side by side, the major difference becomes clear.
Espresso beans are shades darker than coffee beans. Why? Because of their roasting times.
The slow-roasting process of espresso beans concentrates their flavor, which is why they pack such a mighty punch!
It also helps to reduce acidity, leaving only silky-smooth richness in your cup.
|
|
|


The Truth Is in the Bean
Now we know what makes espresso so special — not that anyone needed any convincing!
But let’s take it a bit further and discuss the source of the beans. We’re going for excellence, after all!
Beans from Around the Globe
Coffee flavors differ from region to region.
Coffee beans from Ethiopia tend to have a light and fruity profile. In contrast, Costa Rican beans have pleasantly rich and bold flavors.
The climate, processing methods, and farming techniques are what make a noticeable difference in taste. Meaning, organically-grown beans produced with high standards for quality control will make the best espresso.
Get to know your beans.
Explore the differences in coffee beans from around the world, like those made explicitly from ethically-sourced beans.
See what region produces your favorite flavors.
Are You Getting Fresh Beans?
To make espresso with the best flavor, freshly roasted beans are the way to go. The math on this is simple — the longer the beans sit, the more flavor they lose.
Have you ever opened a bag of coffee beans, and the scent practically takes over the room? If so, you’ve experienced freshly-roasted beans.
To be 100% sure you’re getting the freshest roast, sign up for Nomad Coffee Club. We always roast your beans to order and deliver them straight to your doorstep.
Choose Your Technique
No matter what device you use, you’ll need some source of pressure to make espresso. Let’s take a look at the options.
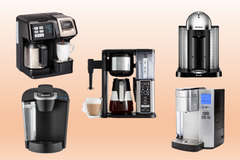
Espresso Machine
This brew machine has one job: to make the perfect espresso.
If you consider yourself an espresso connoisseur, an espresso machine is well worth the investment and counter space.

But having a full-sized espresso machine isn’t practical for every household. So we’d like to share some alternatives that allow you to brew espresso without a machine.
Maybe you already have one or two of these devices at home.
AeroPress
AeroPress was created by the president of Aerobie, Alan Adler.
Whew, that’s a lot of A’s!
The user-friendly, portable brew device is ideal for those who enjoy their espresso on the lighter side.

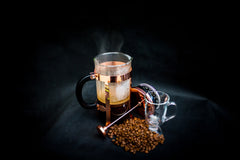
French Press
Yet another press.
The French press is typically used for brewing coffee, but it can also be used as an espresso maker. Oils of the espresso grounds make their way through the filter, resulting in a shot bursting with flavor.
It’s recommended for those who enjoy a strong but well-rounded espresso.

Moka Pot
The stovetop moka pot was invented by Italian engineer Alfonso Bialetti, remaining the choice brew method for most households in Italy.
And we can all agree — Italians know their coffee!
If you like bold, in-your-face espresso, the moka pot is your choice device.

A Step-by-Step Guide for Each Method
We’ve covered the science behind picking the bean. We know our device options for making espresso. Now it’s time to put the bean to the machine and get straight to espresso sippin’!
Espresso Machine
First, the espresso machine brings water to near boiling temperature. Then it pushes the hot water through the ground beans and into your cup for a perfect shot of espresso.
Easy as can be!
What You’ll Need:
- Espresso machine
- Espresso beans: 7 grams
- Water (fill to machine’s required level)
- Hario Scale (recommended)
- Tamper
- Hario Grinder (recommended)
- Espresso cup
Step 1: Turn on the Espresso Machine
Depending on your machine, it will take between 10-15 minutes to warm up. Most machines have a “ready light” or a thermometer telling you when it’s warmed up enough. The ideal temperature for brewing is 200° F/95° C.
Make sure the espresso machine is full of filtered, drinking-quality water.
Step 2: Prepare the Beans
Start by using your scale to weigh out 7 grams of espresso beans.
Then place the measured amount of beans inside the grinder. Adjust the grinder to the finest setting.
Finely ground coffee allows for increased pressure, giving the espresso a nice crema. Start grinding until all of your beans have been pulverized.
Step 3: Press Coffee Grounds Into the Portafilter
Pour the grounds into your portafilter. Lightly tap the portafilter a few times. Then with your tamper, press the grounds so they’re flat and evenly distributed.

Step 4: Lock in the Portafilter and Start Brewing
Place the portafilter in the brew head and check that it’s securely locked in. Switch on the brewing function of your machine and “pull the shot”!
You’ll know when your espresso shot is done pulling when it begins to “blond” — meaning, the shade of the liquid coming out goes from dark brown to a light beige. Or when you’ve reached about one fluid ounce.

Step 5: Enjoy Immediately!
Since espresso shots “die” after sitting for more than 10 seconds, it’s best to drink it right away.
AeroPress
The AeroPress uses pressure to force the liquid through a paper filter. This recipe makes two espresso shots.
What You’ll Need:
- AeroPress
- Espresso beans: 20 grams
- Water: 60 grams
- Hario Scale (recommended)
- AeroPress paper filter
- Hario Grinder (recommended)
- Espresso cup
- Utensil for stirring, such as a cocktail spoon
Step 1: Grind the Beans
Use your scale to measure 20 grams of beans. Then pour them into the grinder.
You’ll want your coffee grounds slightly less fine than you’d use with an espresso machine. Simply select a setting just above the finest on your grinder so the grounds are medium-fine, not completely pulverized.

Step 2: Prepare the AeroPress
Set the AeroPress paper filter in the filter cap. Then pour about a teaspoon of hot water into the cap to warm the filter up. Screw the filter cap back onto the AeroPress and pour in your espresso grounds.
Pro tip: Give the AeroPress a little tap to even out the grounds.
Step 3: Pour Hot Water Over the Grounds
Boil the water and use your scale to measure out 60 grams. Desired water temperature is 200° F / 95° C, or just below boiling point. Then pour the hot water into the AeroPress.
Stir the water and coffee grounds mixture using a long utensil, such as a cocktail spoon or the plastic stirring device that came with your AeroPress.
Step 4: Use Your Plunger to Apply Pressure
Place the AeroPress on top of a cup and insert the plunger. Press the plunger down with your hand until all of the liquid has been pressed through the filter.
If the plunger gets stuck, don’t force it with excessive pressure. You might end up with a big mess in your kitchen. This just means the grounds are too fine. Try again with a coarser setting.

Step 5: Enjoy Your Handmade Espresso
Kick back and sip your espresso — without delay!
French Press
To make espresso using the French press method, you’ll have to first steep the grounds in hot water. Then use pressure to separate the liquid from the grounds.
Keep in mind; this recipe makes eight espresso shots or four doubles. It’s easier to make larger quantities with this method owing to the width of the container.
What You’ll Need:
- Espresso beans: 20 grams
- 1 cup of water, or 250 grams
- Hario Grinder (recommended)
- Bodum French Press (recommended)
- Hario Scale (recommended)
- Espresso cup
Step 1: Heat Up the French Press
While you make your other preparations, fill your French press with boiling water to get it nice and hot.
Step 2: Grind the Beans
Use the scale to measure out 20 grams of beans. Pour the beans into your grinder. You’ll want your grounds at a medium-fine consistency to avoid blockage in the filter. This will look similar to the coarseness of table salt.
Step 3: Boil the Remaining Water
Bring the water you have left on the stove (or in a kettle) back to a boil.
Step 4: Prepare the Hot Water
First, dump the water used to heat the French press.
Then, immediately measure out a cup of your boiled water and set it aside. The water will need to cool to 200°F/95° before being combined with the grounds. This will take about 30 seconds once it’s removed from the stove.
Step 5: Bloom Your Espresso Grounds
Pour 20 grams of espresso grounds into the French press.
Splash about two tablespoons of hot water onto the grounds, allowing them to “bloom”. Let them sit for 10 seconds before adding the rest of the hot water.

Step 6: Add Remaining Water
After allowing your coffee grounds to bloom, pour in the remaining hot water. Place the lid on top of the French press without depressing the plunger. Let it stand for about 4 minutes.
Step 7: Press the Plunger
With your hand, apply slow and steady pressure to push the filter down.
Empty the espresso into a serving pot, or into 4 separate espresso cups.
Step 8: Enjoy Espresso With Friends
Whether you take a shot or a double, you’ll still have plenty left to share! Enjoy immediately for the best flavor.
Moka Pot
The moka pot pushes steam-pressured water through grounds to make espresso. A simple, elegant stovetop coffee brewing technique for an out-of-this-world espresso.
What You’ll Need:
- Moka Pot
- Espresso beans: 20 grams
- Cold water: enough to fill the moka pot’s lower chamber
- Hario Grinder (recommended)
- Hario Scale (recommended)
- Espresso cup
Step 1: Grind the Beans
Place 20 grams of beans into your grinder. Set the grinding level at medium-fine. The coarseness should be similar to that of table salt.
Step 2: Prepare Moka Pot
Pull apart the different sections of your moka pot and set them aside. Take the lower chamber and fill it with cold, filtered water up to the safety valve.
Fill the filter basket to the top with your ground coffee.
Step 3: Put the Parts Back Together
Place the filter basket on top of the lower chamber. Then screw the top section of the moka pot to the lower section.

Step 4: Heat up the Moka Pot
Put your moka pot on the stove and heat it at medium-high heat. Wait until you hear a bubbling sound — this means the liquid has been pushed into the upper chamber and is ready.
Step 5: Pour and Sip
Remove the moka pot from the stovetop and pour the contents into an espresso cup. Drink immediately for the best taste.
Final Thoughts Before Sending You on Your Espresso-Sipping Way
To our fellow coffee enthusiasts: we hope you’ve learned a lot about the science behind the perfect espresso shot.
No matter which method you use, there’s one thing you’ll always need to make excellent espresso: quality beans.
For beans from around the globe that meet fair trade standards, sign up with Nomad Coffee Club. Select the plan that best fits your lifestyle.
We use a portion of the proceeds from every bag purchased to fund building the Nomad School in Kenya.
So you can experience the difference while making a difference.
And, once you've mastered the art of how to make espresso at home, try advancing your coffee skills on a homemade latte and the nuances of steamed milk!
Additional Reading
The Best French Press Coffee Maker: A Detailed Review

The Best Drip Coffee Maker

10 Unique Father’s Day Gift Ideas for Coffee Lovers (2024 Edition)
The Best Single-Serve Coffee Makers for a Quick Caffeine Boost
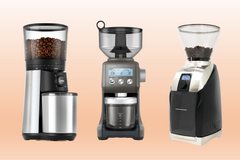
The Best Burr Coffee Grinders Reviewed