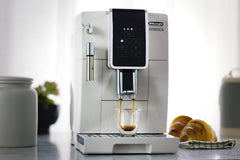
Unless you're familiar with this stovetop espresso maker, you're probably wondering what a Moka Pot is. The Moka Pot was invented in 1933 by Luigi di Ponti and Alfonso Bialetti.
Due to its Italian industrial design, the moka pot is featured in the permanent collections at the Museum of Modern Art. Its name comes from the city of Mekha in Yemen, which is well-known for its high quality Arabica coffee beans.
The following article will guide you through how to use a moka pot and the necessary steps to brew your own espresso coffee.
Table of Contents
- What You Need to Brew a Moka Pot Coffee
- Moka Pot Coffee to Water Ratio
- Prepare Your Moka Pot Coffee
- Step 1: Pre-Heat Water
- Step 2: Measure and Grind Coffee
- Step 3: Add Water
- Step 4: Assemble Moka Pot
- Step 5: Set Moka Pot on Stove
- Step 6: Sit and Wait
- Step 7: Golden Honey Colour
- Step 8: Sit back and enjoy your delicious coffee!
- Step 9: After Care and Cleaning
- Moka Pot Tips and Tricks
What You Need to Brew a Moka Pot Coffee
In order to brew a moka pot coffee, you'll need:
- A Moka Pot that fits your needs
- Whole Coffee Beans
- A Coffee Bean Grinder
- Hot Water
- A Cold/Cool Towel
Moka Pot Coffee to Water Ratio
When it comes to the coffee to water ratio, something to keep in mind is that you should never fill a moka pot only halfway.
The reasons for this are:
- There would be too much air in the water chamber
- The ground coffee would not be packed down enough
Therefore, when purchasing a moka pot, think of how many people you will most likely be serving on a regular basis.
If you don't host many gatherings, or there are only a couple of coffee / espresso drinkers in your household, you should look for a pot that can make one to three servings (the three serving pot is purchased the most).
If you think you'll be serving more than a couple of people at a time on a more frequent basis, then it would definitely be worthwhile to purchase a larger stovetop moka pot. If so, the 12-cup Bialetti stovetop espresso maker is a great choice.
Prepare Your Moka Pot Coffee

Before following these steps, always make sure your moka pot is thoroughly cleaned.
Forgetting to clean the moka pot may leave old coffee grounds behind, resulting in an extremely bitter coffee taste.
Also, make sure to have everything ready, and nearby, to make things easier.
Step 1: Pre-Heat Water
Pre-heating cold water will minimize the amount of time the moka pot will need to stay on the stovetop.
This will also help prevent the coffee grinds from "cooking" while the pot sits on the heat source.
If this were to happen, the taste of the espresso-style coffee will change and become more bitter.
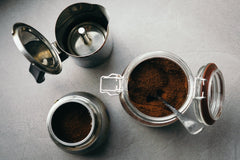
Step 2: Measure and Grind Coffee

Depending on the number of servings desired, measure out the proper amount of coffee. Grind the coffee beans until the proper consistency is achieved.
Don't forget to use a knife or other flat object to level the grounds.
Step 3: Add Water
Fill the water chamber with boiling water.
It should be filled up until the bottom of the release valve, being mindful not to cover the valve.
At this point, throw a damp kitchen towel into the freezer.
Step 4: Assemble Moka Pot
Piece the moka pot coffee maker together, and be watchful for any "runaway" coffee grinds in the ridges.
If there are some coffee grinds in the ridges, use a towel to wipe them away. If you leave them, they will prevent the pot from having a proper seal and pressure, which will then cause a different taste.
Step 5: Set Moka Pot on Stove

Place the Moka Pot on the stove set to low-medium heat.
Be mindful of the possibility that the handle may get hot while brewing - always be cautious while handling!
Step 6: Sit and Wait
At this point, it's time to be patient!
After about 5, if nothing seems to be happening, increase the heat a tiny bit.
What you should be seeing, is coffee beginning to go into the upper chamber. It should be more of an ooze than a spurt. If it's spurting out, lower the heat a bit.

Step 7: Golden Honey Colour
Once you see the moka coffee turning into more of a golden honey color, it's time to take the coffee maker off of the heat source.
You can also place the pot onto a cool washcloth to help it stop "cooking" thereby preventing the brewed coffee from continuing to evolve into a cup of hot bitterness.
Step 8: Sit back and enjoy your delicious coffee!
Step 9: After Care and Cleaning Your Moka Pot
It is extremely important to take care of your moka pot once you are done using it. In fact, you don't even need to use soap or other chemicals (it will do more harm than good).
Simply wait for it to cool after use. Then, disassemble it and dump out any coffee grounds and warm water.
Use hot water and your fingers to dislodge any remnants of coffee beans, and then allow it to air dry.
Who doesn't love low maintenance?
Moka Pot Tips and Tricks
If you aren't satisfied with the results of your first Moka Pot coffee brewing experience, do not feel discouraged!
Just like anything else, it will take time and practice to feel confident in preparing and perfecting the perfect brewing process.
The following are a few of the common results beginners tend to have when making their first few pots.
The Coffee Brewed is Too Weak
If you wanted weak coffee, you would've made a simple cup of tea, right?
All kidding aside, this is an extremely frequent result for coffee makers, let alone moka pot users.
You can also try two things:
- Tap the filter basket lightly to help evenly disperse the coffee grinds.
- The next time you are grinding the beans, try grinding them a little bit finer.
The Coffee Brewed is Too Bitter
Here you have the opposite problem; your coffee isn't too weak and it isn't too strong, but it IS bitter.
This can happen when the heat is set just a bit too high, or it is cooking for a bit too long.
Keep an eye on the temperature and the cooking time.
Dull flavor? Little to no sweetness?
The water you use for your coffee matters!
Depending on where your water is sourced, it may have high alkalinity, or large amounts of calcium and/or other minerals. This all influences the taste of the coffee!
The best water for brewing coffee should be clear, odorless, and fresh from the tap. If there are too many minerals coming from your tap water, there are several filters on the market you can use that attach straight onto your tap.
Again, you will learn a lot from trial and error. However, once you taste that perfect cup of espresso, all of the work will be worth it.
Trust us!
Additional Reading

Espresso Your Love with these 9 Valentine's Day Coffee Gifts

10 Mother’s Day Gift Ideas for the Mom That Loves Coffee (2024 Edition)
The Best Moka Pots and Stovetop Espresso Makers
The Best Gifts for Coffee Lovers

The 5 Most Convenient Coffee Subscription Services in 2024